
Holiday decor feels more special when it’s made by hand. A homemade wreath not only adds charm to any door but also captures the cozy spirit of the season. Plant expert Tassy de Give recently showed how anyone can craft a gorgeous wreath in less than an hour, no crafting expertise required. Her secret? A grapevine base, fresh stems, and a few simple techniques.
During her class at Seattle’s 1 Hotel, every participant left with a unique, eye-catching wreath. Each looked different but carried its own natural beauty. De Give’s philosophy is simple: keep it easy and fun.
Start with the Right Base
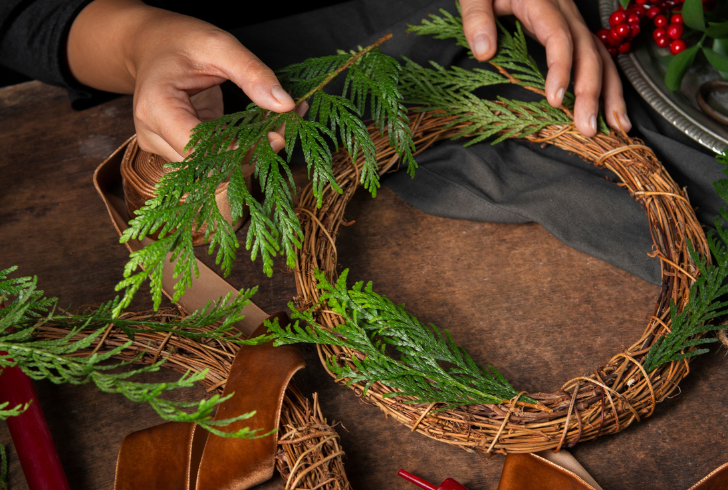
Freepik | Choose a grapevine base and weave natural stems to create an easy and balanced wreath.
Instead of using a metal frame that takes time to cover, de Give recommends a grapevine form. It’s a sustainable byproduct of pruning that already looks earthy and elegant. Since half the vine can remain visible, it saves both time and effort.
Using flexible paddle wire, weave your stems into the grapevine. Whether you choose pine for longevity or berries for a pop of color, each element adds meaning and balance.
“There’s no such thing as right or wrong when you’re creating art,” says Glasswing’s Juli Ann Sprunger, who assisted de Give during the workshop.
Gather Natural and Sustainable Materials
Great wreaths start with great materials. Natural greens and textures bring freshness to the design. Anyone can collect stems from their yard, a neighborhood walk, or local markets. Once the materials are ready, it’s time to begin the creative process.
Step 1: Prepare Everything Before You Start
Think of this step like setting up ingredients for baking. Group materials into three categories:
1. Base layer - sturdy greens for structure.
2. Medium layer - fillers for texture and contrast.
3. Top layer - accent pieces for focus and flair.
Keeping everything organized ensures a smooth design process. Remember, simplicity often leads to elegance.
Step 2: Build a Balanced Base
Strip the lower part of each stem, then thread it through the grapevine form to secure it. The design can grow evenly on both sides for symmetry or flow in one direction for a modern look. Cover about half the frame, leaving the natural vine visible to add rustic charm.
Step 3: Add Texture and Flow

Freepik | Making a seasonal wreath brings joy, creativity, and a warm holiday feeling into the home.
Use textural fillers to create depth and movement. Combine soft foliage with sharper accents to make the wreath feel alive. Let some stems extend slightly beyond the base to create a natural, layered appearance.
Step 4: Create a Focal Point
This step brings personality to the wreath. Treat it like arranging a small bouquet within your design. Use repetition and contrast, such as bright berries paired with soft pine, to guide the eye. Keep it balanced but not overly perfect.
Step 5: Preserve Its Beauty
To keep the wreath fresh, place it in a cool, humid space. A covered porch works best. Lightly mist it daily to maintain moisture. When displayed indoors, expect it to dry faster, so consider mixing in dried materials for longevity.
Perfection isn’t the goal, expression is. Every handmade wreath tells its own story through texture, shape, and color. Whether it’s refined or a little wild, it reflects the joy of the holiday season. Taking time to craft something with natural elements connects the maker to both tradition and creativity, turning a simple wreath into a symbol of warmth and celebration.